

How To Remove Speedometer Cable From Transmission
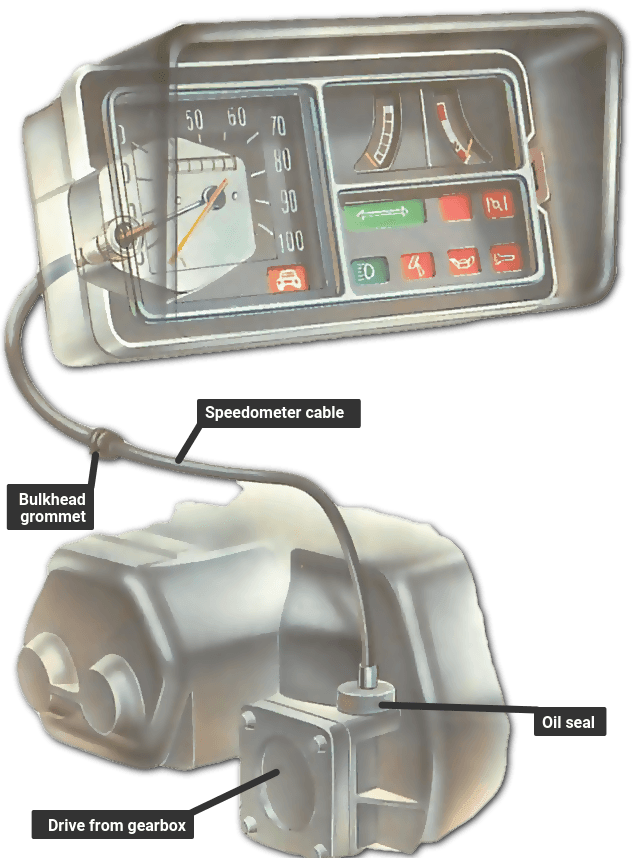
Speedometer failure is probable to be acquired by a error in the cable that runs from the gearbox to the back of the speedometer gauge.
If the estimate needle does non move at all, the inner cable or drive may be broken; or the cable's square ends may have go rounded with clothing and fail to engage in the sockets.
The fixings at the ends tin can work loose or be wrongly fitted.
If the gauge needle swings or moves sluggishly, gearbox oil may have seeped upward the cable and got into the speedometer itself. In that case, yous must supersede the speedometer.
If the needle twitches chop-chop, see whether the cablevision is crushed, kinked or too sharply bent. Intermittent twitches can exist caused by loose connections or past worn and slipping ends on the cablevision.
A borer noise is a sign of a damaged bulldoze or lack of lubrication.
To examine the cable for any of these faults, support the auto securely on axle stands or ramps.
Disconnecting and checking the cablevision
First look over the whole length of the outer cable to see if the casing is broken anywhere.
Make certain that the cable follows a smoothly curved route and is not kinked or crushed. At that place should be no bend within 50mm of either end. Bends elsewhere should have a radius of not less than 150mm.
On some cars, guide clips hold the cable in place. Make certain that it has not worked loose.
The cable is connected to the gearbox by a knurled thimble nut, a circlip, or a forked plate .
Unscrew a thimble nut with your fingers, starting it with large grips if necessary. Squeeze a circlip free with circlip pliers.
A single screw holds a forked retaining plate. Unscrew it.
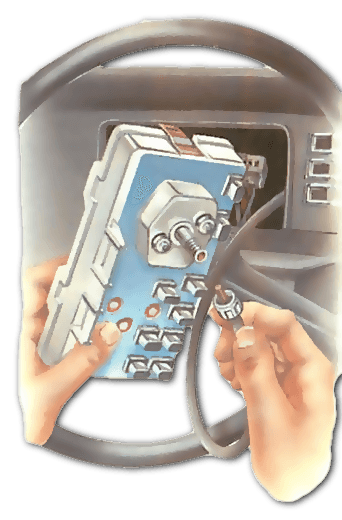
The top end of the cable is harder to reach. If you cannot achieve information technology, remove the speedometer or the instrument panel.
The top connectedness is a knurled thimble nut, or one of several types of prune. About clips release when they are pushed in and turned sideways; one type has a ribbed area on ane side, which yous depress to release the clip.
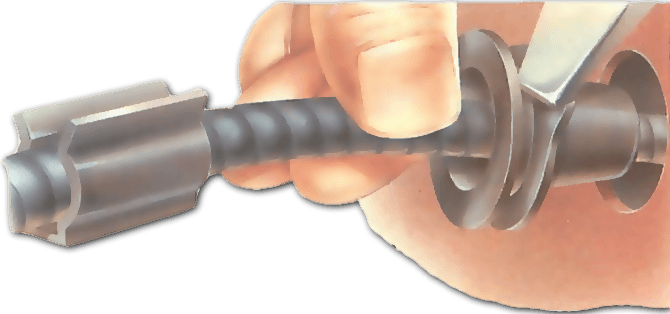
Examine the square ends of the drive for wear and check that the fixings are sound.
Turn ane terminate of the bulldoze by mitt while a helper watches the other end. If the other finish does not turn, the drive is broken. If the drive turns stiffly or yous feel it snagging, bank check that it is non kinked or crushed by a sharp curve or a guide prune.
If ane end of the drive moves in a circle instead of revolving on the spot, the drive is kinked.
If the drive seems undamaged but is generally stiff, information technology may need lubrication.
Pull the drive out of the casing, make clean the drive with petrol, smear information technology sparingly with grease and slide it dorsum.
Some inner cables, however, have captive ends and you cannot pull them out. In that case, feed light oil betwixt the cable and outer sheath.
Fitting the new cable assembly
Observe and release all the guide clips, and lever out the rubber grommet where the cablevision passes through the bulkhead. Pull the cable out into the engine compartment.
Check again that y'all need a new cablevision. Repeat the turning examination to encounter if the bulldoze is kinked; or pull out the drive and roll it along a flat surface. Hold the cable in a 'U' shape virtually 230mm broad. Turn one end of the drive. It should move smoothly without catching inside the casing.
Sometimes y'all can renew the drive alone, but makers now tend to supply only complete cables. In any case, have the one-time cable to the parts store to make certain that the new ane is identical. It is a good thought to buy a new gearbox oil seal at the aforementioned time.
Push the top terminate of the new cable through the bulkhead. Use a thin screwdriver to ease the grommet into place.
Refit the cable into its guide clips. Some clips have bands to marker the points that should fit into the clip. They are a useful cheque that you are routing the cablevision correctly.
In whatever instance, make certain that the route is smoothly curved. Add together extra clips or bands simply if they are actually needed. Make sure that clips do non squeeze or pull the cable.
To fit the new gearbox oil seal , lever out the old ane with a screwdriver and printing in the new i, making sure information technology seats well.
Refit the lower drive connection, taking care that the foursquare bulldoze end is engaged. Tighten a thimble nut only finger tight, and be careful not to cantankerous-thread it.
The top connection is slightly harder to refit, because it is more difficult to become the second end of the drive engaged.
Refit the speedometer if y'all had to remove it, and exam it by taking the car on a brusque run.
Cable connections into the gearbox
Speedometer cable connections to the gearbox autumn mainly into three types.
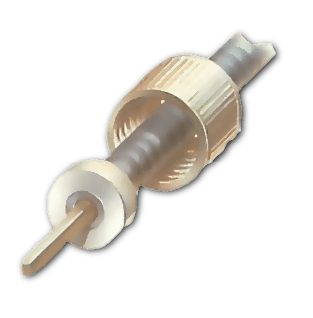
The knurled thimble-but connection is threaded inside, and screws on to the gearbox speedometer outlet - which is too threaded - up to the shoulder.
The circlip connection fits over the cable and into a recess in the gearbox output sleeve , securing both.
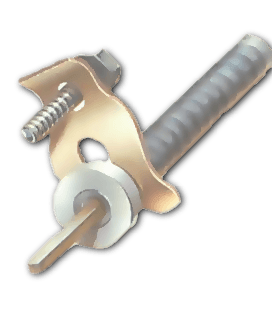
The fork connexion - an older blazon - is merely a shaped fork that holds the cable cease in the gearbox by means of spring pressure . It is secured by a screw.
Sleeve connection
Circlip connection

Fork connection
Source: https://www.howacarworks.com/accessories/fitting-a-new-speedometer-cable
0 Response to "How To Remove Speedometer Cable From Transmission"
Post a Comment