

Do You Color In Background By Just Dipping Your Brush In Ink
Booze ink art is an incredibly fun and absolutely vibrant art form in which anyone tin can get involved, no matter their previous art feel. While alcohol inks can seem a little hard to main at the beginning, I can assure you that they are rewarding and worth the journeying of learning the medium. The possibilities are but limited to what you are willing to attempt. Here is your complete guide on how to apply booze inks and produce amazing fine art work!

What is alcohol ink?
Earlier y'all can master anything, y'all demand to know what it is. Alcohol ink is highly pigmented dye and, of form, alcohol based. These inks are manipulated using isopropyl booze (rubbing booze to you and me). Equally the inks are alcohol based they evaporate much quicker, so the paint dries in but a few minutes. Withal, once the ink is dry information technology can be "revived" to exist processed and manipulated further. Considering of the nature of these inks there is a diverseness of techniques and styles that are unique to alcohol inks, and which let for an endless river of creation to continually flow.
What is booze ink art?
Alcohol ink art is ane of the main members of the fluid arts family, which are equanimous of acrylic pouring, resin art, and booze inks. Fluid art is when you have a medium in liquid form and allow the pigments run wild, creating abstruse pieces. Indeed, alcohol inks fit nicely into this clarification as you can create magnificent abstract pieces by just letting the inks flow, and so controlling them using the different techniques described in this commodity. Nevertheless, the beauty of alcohol inks is that they too allow yous to create fantastic realistic pieces also. Whether you cull to make abstract art or realistic art, the possibilities are unlimited and you lot are leap by nothing– just let your creativity run.
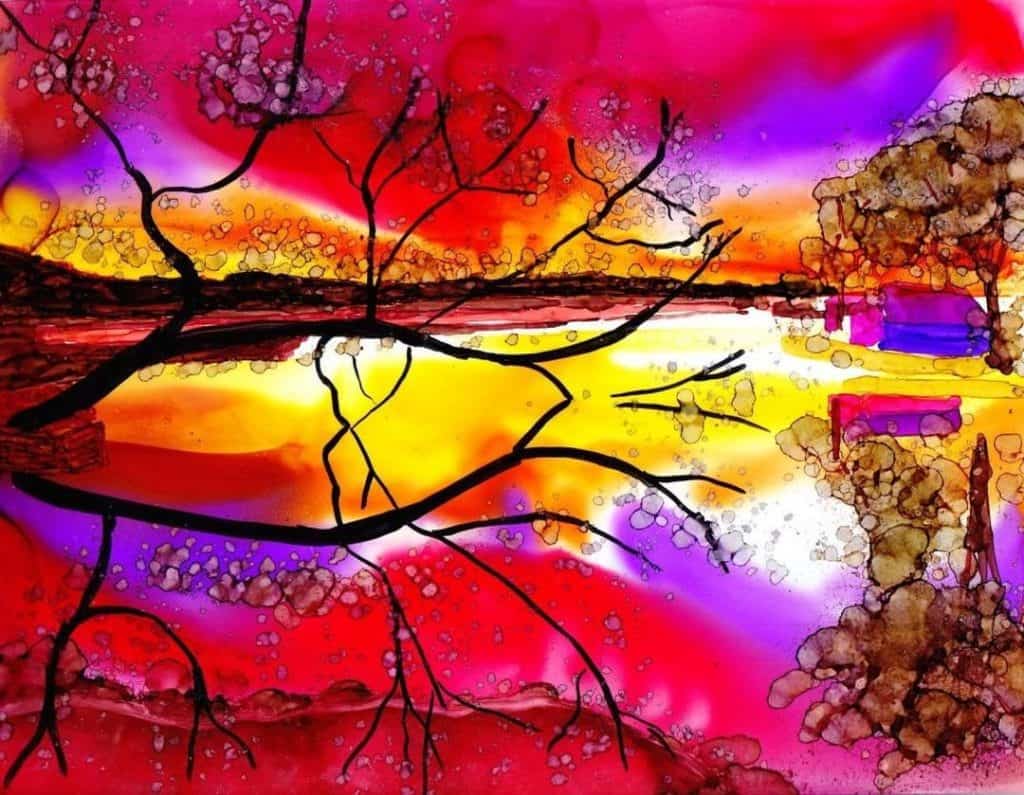
Instance of a more abstruse alcohol ink slice:
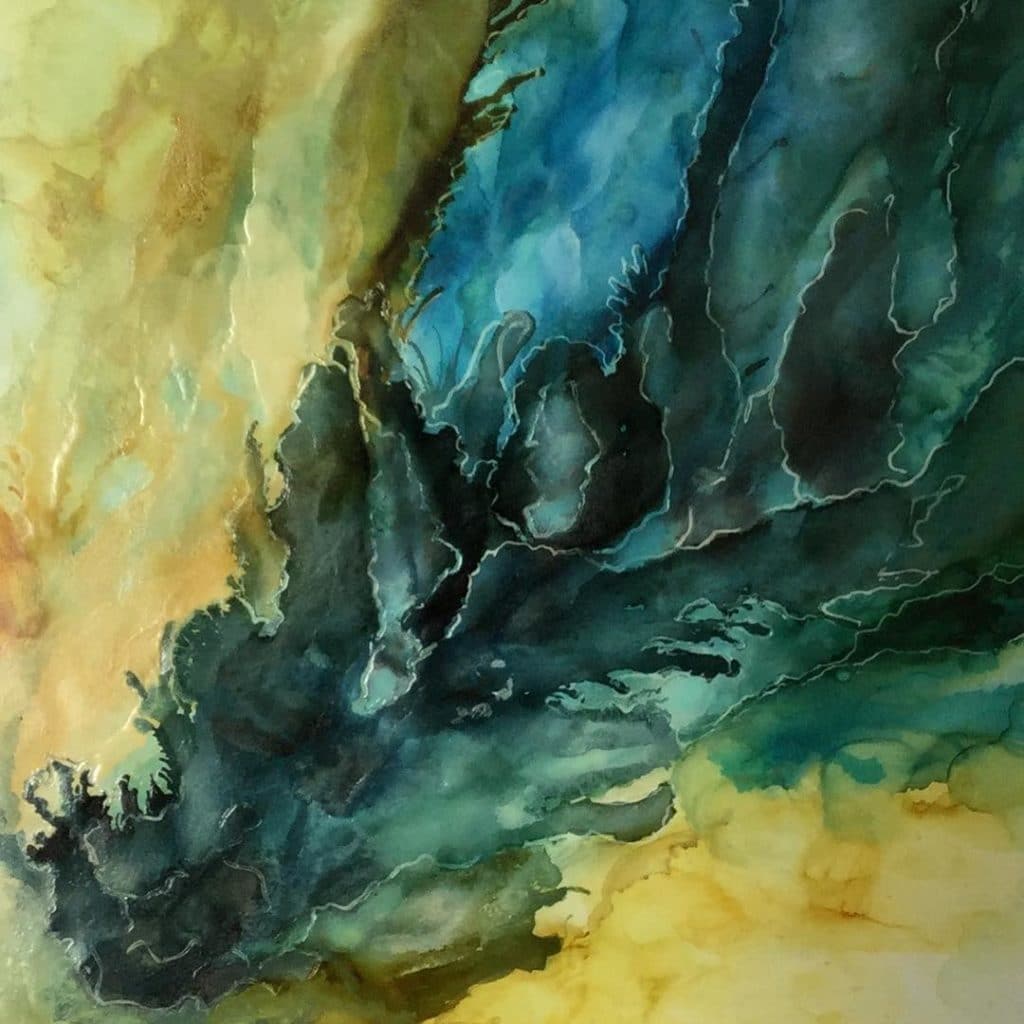
Related: Alcohol Ink Abstract Art Grade
Example of a more than realistic slice:
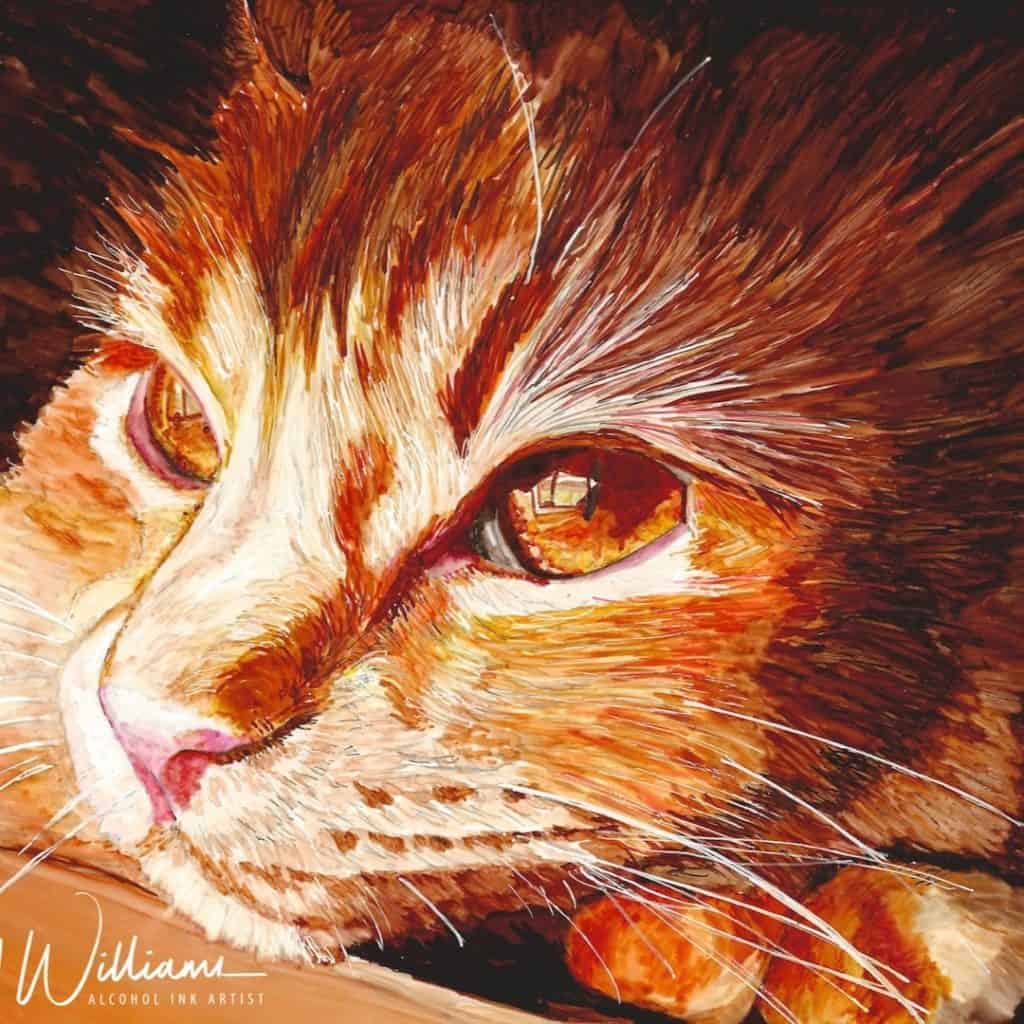
Related: Alcohol Ink Beginners Course
Who is alcohol ink art adept for?
Anyone tin try, experiment and even master alcohol inks. Just like any new medium, you lot need to have the time to acquire how it acts, and how information technology moves so y'all tin can really hone in on your skills and techniques.
If you accept taken a liking to acrylic pouring, even if you have mastered information technology, alcohol inks may just be the side by side footstep for you. They can exist a little more than challenging due to the manner they interact with each other, however they provide more control.
If you love h2o color art, simply notice it to exist a little too hard, you may want to experiment with alcohol inks. While the wait can be similar, some of the bones principles are unlike compared to watercolors, and so you first have to wrap your head around that. Only once yous do, you may find that you really savour the easier execution and vibrant nature of the fine art class.
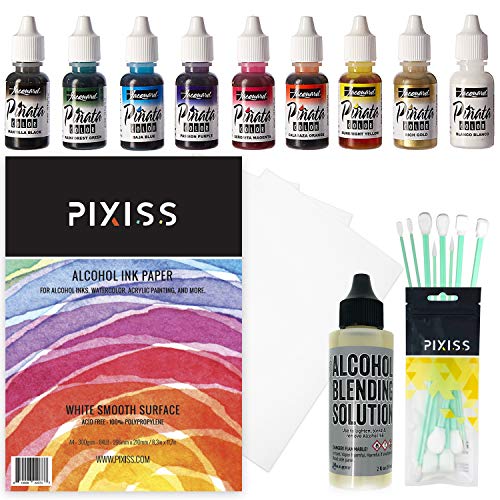
Alcohol Ink Supplies
Don't worry, like acrylic pouring, alcohol ink art doesn't crave a huge amount of supplies to get started. You can experiment and do a lot with only a few items! Hither is a basic overview of the supplies you need to get started.
- Yupo newspaper
- Ceramic tile
- Tim Holz Adirondack Inks
- Pinata Inks
- Booze ink markers
- Blending solution
- Brushes
- Droppers
- Spray bottles
- Sponges
- Blending tools
Booze Ink Starter Kit
If you desire to get started with the basics you can check out this alcohol ink starter kit beneath. It has everything y'all need to start including inks, alcohol ink specialized paper, blending solution, and blending tools:
Click for Price
Surfaces (Substrates)
One of the all-time things almost alcohol ink is that information technology works well on a variety of mediums beyond traditional paper. Drinking glass, wood, metals, ceramics, and plastics are all suitable mediums. Indeed, you can explore and get artistic with ny non-porous substrate.
Yupo Paper
In regards to paper as a surface, it's important to empathise that alcohol inks tin't be used on normal paper every bit it is too porous. The dye would simply be absorbed straight into the newspaper like a fountain pen and yous won't get those bright, vibrant, clean colors you want. To do good from the unique look of booze inks, and to be able to manipulate them in ways that allow for their unique style, a special kind of glossy paper is needed.
Yupo paperis a special sheet that is fabricated of polypropylene, it feels similar a piece of flexible plastic. Available in white and transparent, every bit well every bit a diverseness of weights you accept consummate control over your project. For a beginner it is all-time to use white Yupo newspaper that is either 153 gsm (grams per square meter) or 200 gsm.
Did you know? Yupo newspaper is also tear and water resistant — y'all don't have to worry nearly accidentally ripping your paper if you have tapped it down!
Yupo vs Ceramic Tile
For beginners, yous can use either yupo or ceramic tile when it come to painting with alcohol inks. All the same, there are a few differences you demand to be enlightened of as information technology can touch the color and how you protect your paintings.
The main divergence is the ability to wipe back to white and how to frame your painting. Inks on Yupo will stain with a bit of colour that can be used to enhance your painting. Inks on tile tin can be completely wiped back to white. Yupo can be sealed and framed as any fine fine art painting, tile must sealed and can exist a claiming to mount and frame.
Depending on what you are after with your paintings, both can be incredibly advantageous to your overall masterpiece. Only get experimenting and run into what you can do.
| Yupo Paper | Ceramic Tile |
| Ink stains the paper | Ink can be lifted back to white |
| Ink spreads further | Ink spreads less |
| Can seal with Krylon Kamar | Must seal with Krylon Kamar |
| Piece of cake to mat and frame | Challenge to mat and frame |
In addition to newspaper, you can use alcohol inks on:
- Drinking glass ie. wine glasses, tumblers etc
- Forest
- Metals
- Ceramics ie. tiles
- Sleeky cardstock
- Plastic
- Canvas prepared for non-porous surface
- Whiteboards
For more info on substrates and comparisons check out the video below:
Tips
- When using the alcohol inks it is all-time to use a clear sealer or resin to prevent information technology from wiping off or running afterwards on– that would be disastrous later all the hard work you have only put in! Two to three thin coats should do it. I recommend using Krylon Kamar for two-3 coats then a UV sealer.
- Y'all should touch on your surface equally little every bit possible, or avoid it completely and habiliment some rubber gloves. The natural oils in your skin can actually transfer to your surface and prohibit the inks from interim normal. Plus, wearing gloves means your hands won't get stained!
Inks
Just like whatever art medium there are many brands and types of inks. They are often sold in 0.5oz bottles in a range of colors and dyes. A footling goes a long style with this medium, you lot will be surprised just how picayune you demand to create a beautiful slice of fine art. This is because it'south dye rather than pigment. The dye particles are very pocket-sized and can be dispersed over a large area.
Adirondack Alcohol Inks
This is the chief brand when it comes to booze inks. It is as well known as Ranger Ink and information technology was created past Tim Holtz. Adirondack booze inks tin can be brought in packs of three. These packs are really useful for beginners as it takes some of the guesswork away when it comes to discovering what colors/dyes work well together and blend beautifully.
Besides their 60 color collection, Ranger Inks besides has a metal collectionthat can actually liven up any slice. The metal inks can be used to add highlights and even add together texture. Exist warned though, you lot can't become in heavy with these as they tin hands overpower a piece.
Jacquard Pinata Inks
Jacquard Pinata Inks are some other get-to when it comes to alcohol inks. They are incredibly rich dyes and fast drying. Supplying a good variety of colors and even some beautiful metallic inks, you won't be running out of options. Pinata Inks pride themselves on being highly saturated and using only the most lightfast dyes to ensure premium quality.
The Pinata Inks are another great selection for beginners as you can buy a class pack, which provides you with a variety of colors, clean up solution and a few actress goodies. Getting started with alcohol inks has never been easier.
Tip
- For metallics, be sure to shake the bottle well before using to ensure that the product is mixed properly. There's a brawl begetting within to assistance with mixing. Standard inks don't need to be mixed.
Markers
If you aren't i for a paintbrush and prefer more of a depict on style, there are even alcohol ink markers yous can use! Markers can be great to use when you want more than control and want to create detail.
You lot tin can use markers such as Sharpies to create details and outline once you have finished manipulating the inks. While Sharpies are considered "permanent" markers, artists know that they lose their permanency when used on the right paper and with rubbing alcohol. However, if sealed with Krylon Kamar and UV Protectant they stay permanent. White gel pens are also corking when it comes to adding highlights to your piece as that final finishing touch.
Copic Markers
When it comes to alcohol based markers, this is most definitely a forerunner for most. They have incredible pigmentation and are really easy to utilize. You can purchase these in a variety of different packs with either a chisel bill, a castor nib or both! Copic has thought of everything to ensure that you become what you lot demand.
Copic also allows you to purchase refills for the markers, or just use the refills for the ink with a brush! With 368 colors, you can get whatsoever tone or color combination y'all are after.
Sharpies
The adept old Sharpiesare fifty-fifty alcohol based markers. These markers can give a little more than variety in terms of colors as it has neon, metallic, pastel, and of course, the traditional collections.
Sharpies are groovy to use as a beginner tool, due to the popularity of the brand and the familiarity just about anybody has with the markers. You lot can just color and so use rubbing alcohol to marble and blur the lines. It turns out merely gorgeous!
Blending solution and rubbing alcohol
Blending solution and rubbing booze is to alcohol inks what H2o is to watercolors. Y'all absolutely need it and you are going to need a lot of it. Having a blending solution allows you to broaden your technical possibilities, your tones and allows your ink to go further.
A blending solution is made up of isopropyl alcohol and glycerine. Y'all utilize this to dilute the inks to create a variety of tones and blend to create shine transitions between dye. You can even apply the solution to clean upwards the inks off of slick surfaces, tools, and your hands or dilute colors so much they eliminate the dye.
The two main brands for blending solution are the same as for inks:
- Ranger Adirondack Blending Solution
- Pinata Blending Solution
You tin can likewise purchase pure isopropyl alcohol, normally referred to every bit rubbing alcohol, instead or in combination with a blending solution. If you do decide to use rubbing alcohol, yous'll want to select a percentage that suits y'all. College percents like 99% can be used in extreme humidity while lower percentages like seventy% alcohol may be fine in dry climates. Experiment a little or ask local booze ink artists to find out what works all-time in your location.
For a demonstration on how the proportion of ink to dye influences your work cheque out the video below:
Blending Tools
Blending Tools are very of import with alcohol inks when yous create representational paintings to alloy and soften edges. The most popular blending tools are beneath. The difference in each tool is the size and flexibility of the tip. All except the Cotton Swabs can contain either alcohol or blending solution.
- Cotton Swabs
- Tsukineko Fantastix
- H2o brushes
- Copic Colorless Blender
- Ranger Alcohol Ink Blending Pen
Booze Ink Application Supplies
When it comes to applying inks there is a variety of options at your disposal. The surface you are using and the type of fine art you want to complete volition dictate which application method, or combination of methods you are going to use. Here are a few of the more than common applicators when it comes to alcohol ink art:
- Brushes
- Droppers
- Spray bottles
- Sponges
- Felt
- Stamps
- Magic erasers
Applying Alcohol Ink Techniques
There are many methods of applying ink to your surface and they each give you a different effect. I'll embrace some of the basic techniques beneath, simply if you want a more comprehensive overview check out my alcohol inks for beginners class.
Push button and Glide Technique
The start pace in learning to command the alcohol inks is the Push button and Glide technique. You learn the curl of the alcohol and how to allow some of the alcohol to evaporate off, leaving behind more intense color.
- Draw a basic shape
- Put some ink into a palette
- Dip your castor into the ink
- Identify your brush into the center of the shape.
- Lookout man how far the ink moves towards the edges of your shape
- Use your brush to gently move ink in the shape towards the outside
The corporeality of alcohol in the ink volition dictate how far the ink will move abroad from where you place it.
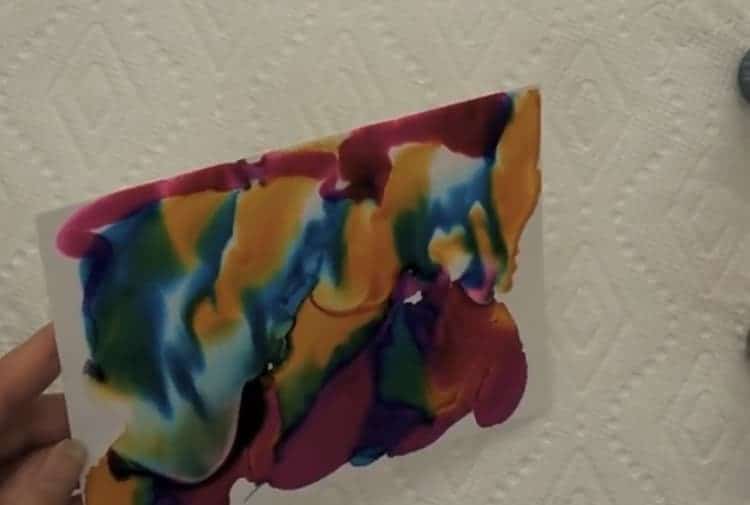
Drop/Cascade Technique
This is the nigh bones method of applying alcohol inks. This can create really beautiful backgrounds and abstract designs.
- Have a canvass of your paper.
- Choose a minimum of three colors.
- Place a single drop direct from the canteen. Meet how information technology spreads out into a circle?
- Drop a new color to the first dot. See how new colors spreads and pushed the start color?
- Continue dropping your colors over the paper until yous are satisfied.
- Let to dry.
Drop/Pour/Tilt Technique
This technique is perfect for creating background. Ultimately, you baste multiple colors onto your newspaper/surface and tilt to alloy the inks. You can use a coffee stirrer or a wooden stick of some sort to spread the ink to the edges of the folio before information technology dries.
- Choose three colors. (This is where the Adirondack Inks come in really handy, so yous already know which iii y'all should choose.)
- Cover the surface using blending solution/rubbing alcohol.
- Tilt the paper/surface gently to spread the blending solution/rubbing alcohol.
- Use a java stirrer to spread it out correct to the edges
- Randomly drop/cascade your colors direct out of the canteen over the surface.
- Tilt gently to movement the inks effectually. Use a coffee stirrer to pull the dye to the edges of the page while it is still wet.
- Let dry out, watch the colors as they blend and accommodate.
- Practice it again, this time without any blending solution.
- Do it again, this time with blending solution and without tilting.
- And again, without the blending solution and without tilting the page.
You lot should now have four pieces of alcohol ink art. Carefully, look at the differences between them.
What do you see?
- Are your tones lighter where you have used more blending solution?
- Do yous have white circles? (If you don't accept any white circles, take some blending solution and drop a drop onto one of the artworks you just did and watch information technology)
- Is your ink uneven?
If you want to continue, now is the time to bring out some texture. This is another vivid aspect of alcohol inks that you lot will dear!
Adding Texture: Option 1
- Have i of the four paintings you did in a higher place.
- Spray a department of your painting with a fine mist spritzer bottle filled with rubbing alcohol later on it has had a little time to dry out– around v minutes.
- Allow the paint dry a trivial longer and spray another section of the painting.
- Allow the paint dry completely and spray another area.
What do yous observe?
The variations of time you let your inks to dry before misting with alcohol will alter the texture yous become and it can also touch on the tone of your inks. If you lot spray your ink too early before it has dried a little, it volition only lighten the tone of the ink and requite you literally no texture.
Experiment a picayune with information technology and run into the different textures you lot tin get.
Calculation Texture: Option ii
- Have another one of your paintings from higher up.
- Allow information technology to dry out for approximately five minutes.
- Driblet/cascade some more ink.
What do yous see?
Are there now difficult lines on your folio where you dropped the new ink? This happens when your ink has started to dry out and you add more ink on peak of/next to the drying ink. You can practise this by accident or on purpose to create texture.
Using A Cotton Round/Bud
If you desire something a little smoother and flatter use a cotton wool round. This is actually effective for creating a base of operations colour for a large area, such as a heaven.
- Take a palette and put some ink in it.
- Dip your cotton fiber round into the ink.
- Swipe beyond the page, applying an even pressure level.
If you want to create a gradient, simply add together a petty blending solution as yous go down (darkest to lightest). Each fourth dimension you add more blending solution, the tone of the ink will lighten, allowing you to swipe a gradient over your sail.
Creating flat wash with a Brush
If you want something a trivial more traditional in terms of application, you lot tin can use a castor to create a apartment launder. The larger and higher quality the castor, the larger uniform shapes y'all'll be able to create.
- Use a large, apartment brush.
- Dip information technology into your desired ink.
- Swipe across the page using an even pressure.
If the ink dries out also quickly, or you lot allow it to sit, you lot will finish up with brush marks. You need to be a footling speedy if yous want an even application.
If yous are later a gradient, in that location are two ways you can go nearly this. It all comes down to when you add the alcohol or blending solution. We refer to blending solution beneath, but y'all can employ either alcohol or blending solution to attain the result.
Gradient Method: add Blending Solution to Ink
With this gradient method, add together blending solution to your ink every bit you brand your way downwards the page. When you brainstorm adding the blending solution it slowly causes the ink to sparse, thus enabling it to move more. This can limit your control over the ink and crusade unevenness.
- Put your desired ink into a palette.
- Dip your brush into the ink.
- Do the first swipe over your page.
- Add a little alcohol or blending solution to the ink.
- Dip brush again and do the 2nd swipe over the folio.
- Repeat steps 4-6 until your folio is covered.
Gradient Method: Add Blending Solution to Page
This method of gradation creates a ameliorate gradient, still you are more than likely going to end upwards with movement lines and puddles where the ink has run into the blending solution.
- Brush blending solution over your paper.
- Add desired ink to one edge using a brush.
- Tilt page to blend ink into the blending solution.
- Use brush to drag ink out to edges, if required.
Tip
When it comes to using a castor it can really help to experiment. Use different brush sizes, flat vs round, liner, rake, and fifty-fifty a fan brush!
Controlling Your Alcohol Inks
Learning methods of applying ink is all well and good, but you are going to want to know how to control the inks to be able to become various textures and really refine the detail in your pieces. Here are a few methods of ink command that tin can be incredibly useful.
Straw/Hair Dryer
When information technology comes to creating gradients, you can use a straw or hair dryer to move the ink around and force information technology to blend seamlessly. If you use a straw, be careful of wet buildup inside the tube every bit if it drips, it could ruin your masterpiece. If using a pilus dryer, be certain information technology is on a low airflow setting (this avoids splashing and pushing the ink off your page) and the coolest setting in regards to heat.
- Use the driblet/pour method mentioned above.
- Add more than booze to your painting.
- Use the hair dryer/straw to push the inks effectually.
- Let to dry.
Stamping/Drawing Technique
If you want to add a pattern or some details to your painting, one of the easiest methods is to utilize a stamping technique. You can use a castor, a postage or experiment with other tools– the possibilities are endless.
Using a Brush
Using the brush dipped in alcohol you lot tin can lift some of the ink off the newspaper. Note: Yupo stains so you won't be able to wipe dorsum to white. There are newer substraits that allow y'all to wipe dorsum to white.
- Use one of the methods mentioned in applying inks to a higher place to create your base.
- Take a brush and dip it in booze.
- Wipe off whatsoever excess and then it doesn't drip.
- You can draw lines, dots– anything you could desire to create details.
Using a Stamp
This works the aforementioned equally the brush method by using booze to create definition in your painting, except this time you are using stamps. This is really useful if you lot want to add lettering to your alcohol ink painting, or stars to a night sky.
- Pick an appropriate postage stamp for your painting.
- Dip it into some rubbing alcohol.
- Make sure the postage isn't going to drip.
- Stamp the stamp onto your painting.
Alcohol Ink Beginners Tips and Tricks
There are a lot of fiddling things nearly alcohol ink you tin can learn to ameliorate your control over the medium. Here are some tips and tricks for you to get started.
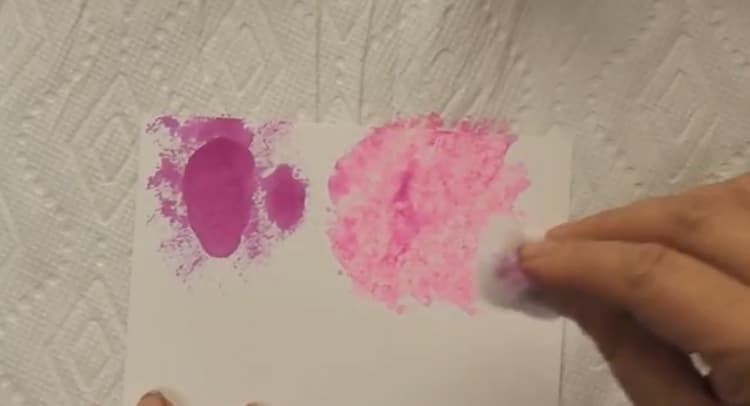
USing rubbing alcohol to eliminate ink
Creating art is a procedure, and you are jump to make mistakes along the way, or change your mind, not to mention the inevitable accidents that happen. One of the all-time things about alcohol inks is that you tin utilize alcohol to eliminate the ink. This means that if y'all ever brand an error or change your mind all you lot take to do is employ your rubbing alcohol to dilute the ink to either lighten the mistake or erase it. On Yupo, since the paper stains, you won't exist able to go back to pure white, just a lighter colour by diluting the ink. For ceramic tiles, you lot can completely erase the ink and starting time over.
Using blending solution to mix colors
Your blending solution is actually important when it comes to mixing colors to achieve a seamless blend. Y'all tin mix colors in a palette or on your page and blending solution tin can make the whole procedure just that much easier.
On Palette (earlier moving on to your fine art surface)
This method is groovy when you desire to mix upward your own unique color, or to create tonal values. By adding blending solution to the inks in the palette you are able to get mid tones which will help you lot effectively establish tonal value in your painting.
Case to brand tonal values of a deep orange/brown:
- Drop a footling orange ink into four sections of your palette.
- Add a little blending solution to the beginning section (this will be your lightest tone).
- Go out the second section as just the orange ink.
- Add a driblet of brown and some blending solution to your third department.
- Add just a drop of dark-brown to your fourth section.
This volition give you lot a overnice palette of colors moving from orange to brown which you can then utilize on your art.
On Surface
This method to employ your blending solution to mix colors is really useful to be able to create a seamless alloy once you've already laid downwards your ink on the surface y'all're working with.
- Paint a foursquare of blueish on your folio.
- Next to the bluish, paint a square of yellow.
- Moisture y'all brush with your blending solution.
- Wipe off whatsoever excess solution, to avert any potential drips.
- Work your brush dorsum and along between the blue and yellow. This will mix the two colors and create a green.
Using blending solution to eliminate lines
Sometimes you just tin't command the inks the manner you lot desire and you can get lines where you practice not want them. This occurs when you identify wet ink adjacent to ink that has started to dry out and the wet ink pushes the dry ink creating a harsh line. If this ever occurs to you lot, follow these four elementary steps:
- Take a castor and dip it your blending solution.
- Lightly wipe off any backlog liquid so y'all don't drip information technology on your project.
- Use the brush and work it dorsum and forth or side to side over the line you want to disappear.
Conclusion
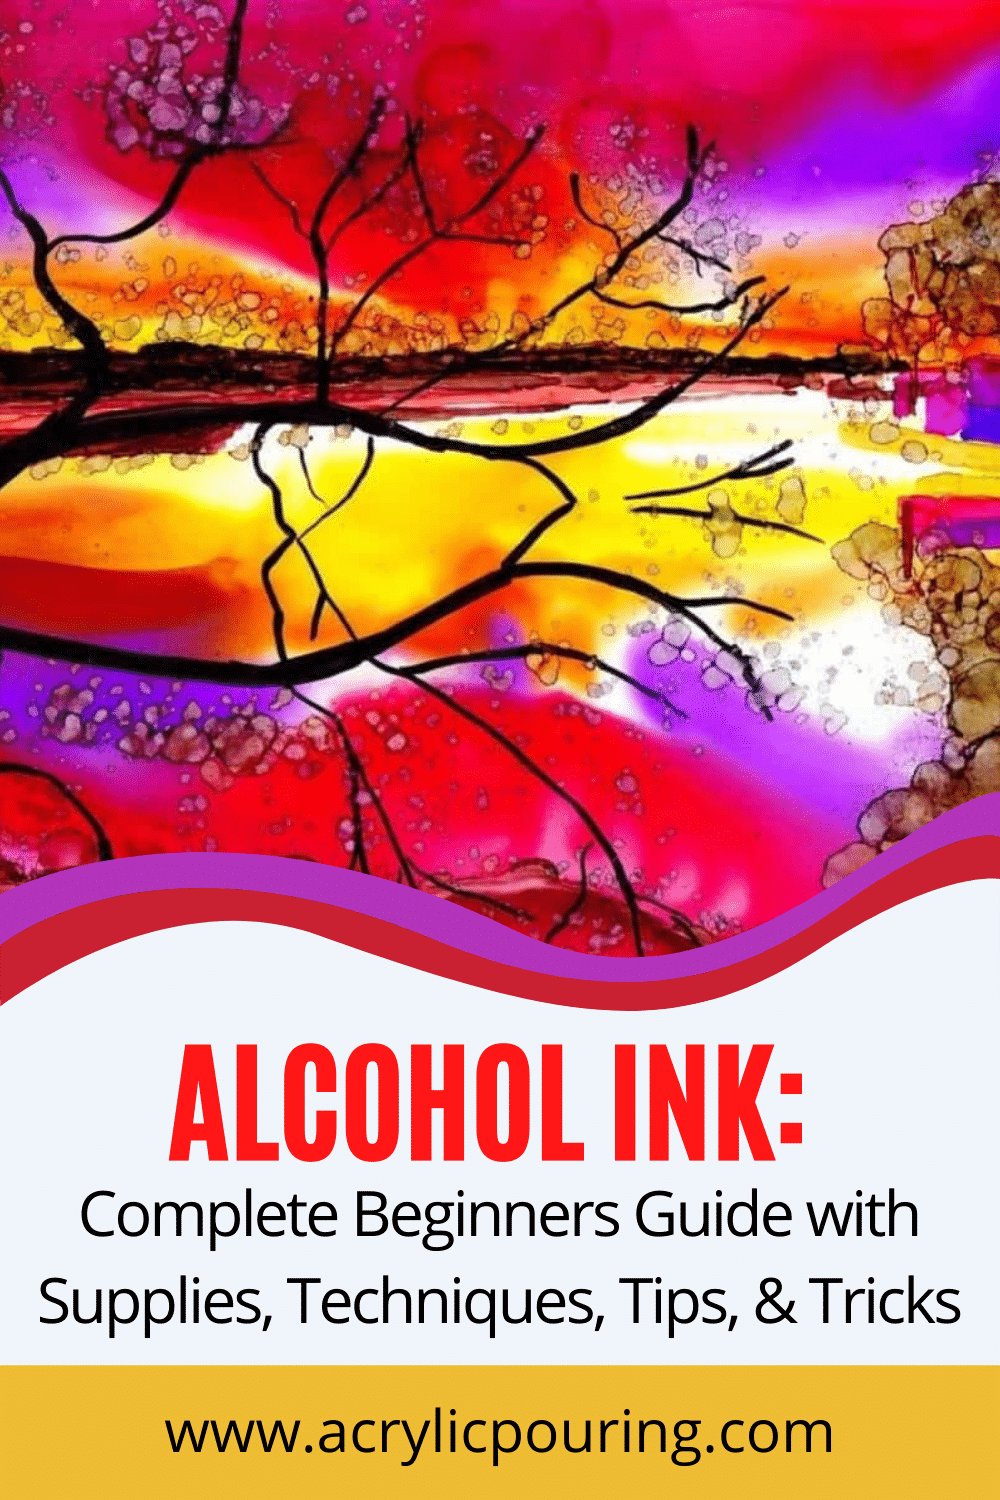
In this article we accept explained alcohol inks and how to become started creating alcohol ink art for beginners. We hope that this article will start yous on your journey to creating alcohol ink art. Alcohol inks are an incredible medium that permit you to explore and venture your artistic side. Whether, you just want beautiful backgrounds or refined and detailed artworks, these vibrant inks are worth learning and experimenting with. And then, what volition you create today?
Desire to learn more about Alcohol Ink?
Check out our other introductory posts on Alcohol Ink Art:
- Alcohol Ink Supplies – Essential Materials for Booze Ink Art
- Prepping the Perfect Alcohol Ink Art Station
- Some of our Favorite Booze Ink Techniques
Here'southward a list of great beginners courses to attempt if you want to deepen you noesis of alcohol ink.
- Level ane Alcohol Ink Beginners Course by Sheryl Williams (Includes over 50+ videos over iii-6 weeks self paced grade)
- Alcohol Ink Beginners Parcel of 6 Courses past Kellie Chasse (Parcel of 6 courses including sunsets, moonscape, dragonfly, and flowers)
- Abstract Alcohol Ink With Resin Finish by Kellie Chasse (Beginner level)
- Alcohol Ink Landscapes by Sharon Parker

I love to teach. My booze ink classes are building blocks of techniques and tools that develop the necessary skills to limited the art within you lot. And cipher thrills me more my students finding their artistic vocalization through Alcohol Inks.

Do You Color In Background By Just Dipping Your Brush In Ink,
Source: https://acrylicpouring.com/alcohol-ink-beginners-how-to-guide/
Posted by: scottworsoll.blogspot.com
0 Response to "Do You Color In Background By Just Dipping Your Brush In Ink"
Post a Comment